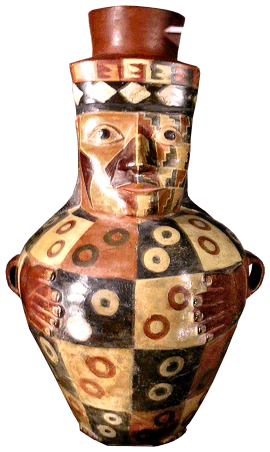
Learning how to make slip is a fundamental skill for anyone interested in pottery and ceramics. Slip, a liquid mixture of clay and water, plays a crucial role in various pottery techniques such as attaching handles, decorating surfaces, or even creating intricate drippy designs. To make slip, a mix of broken-down clay, water, and a touch of distilled white vinegar helps achieve the right consistency and stickiness, ensuring a smooth and versatile product for different artistic applications. Once ready, you can further enhance your slip by adding stains or oxides, allowing you to explore a wide array of colors and textures.
| Slip Color | Oxide Ingredients | Percentage Used |
|---|---|---|
| Blue Slip | Cobalt Oxide | 0.25-0.5% |
| Black Slip | Red Iron Oxide, Manganese Dioxide, Chrome, Cobalt Oxide | 1%, 1%, 0.25-1%, 0.25-1% |
Crafting Pottery Slip: A Step-by-Step Guide
Start your slip-making journey by breaking down the clay into small pieces. Get yourself a sturdy plastic container, perfect for mixing and storing your concoction. Once your clay is ready to undergo transformation, add water generously but not excessively—you want enough to cover the clay without drowning it!

Here’s the secret ingredient you won’t want to skip: distilled white vinegar. It’s not just for your salad! A splash of vinegar helps the clay break down faster, increasing its natural stickiness. Don’t worry too much about exact measurements here; you can eyeball the amount and shake things up with an occasional stir. Allow the mixture some time to come together, stirring occasionally until it becomes a smooth, consistent liquid.

Now, let’s keep things nice and smooth. Strain your mixture into a pristine bowl to rid it of any stubborn lumps or clumps. What you get is a silky slip, ready and waiting to bring your pottery creations to life. You can even experiment with the thickness, perfecting individual batches to match whatever pottery magic you have planned.
Coloring Your Slip with Stains and Oxides
The beauty of slip isn’t just in its function but also in its ability to show off some snazzy color! Want your piece to stand out with blues, blacks, or other fashionable hues? You’ll need to dive into the world of stains and oxides. Whether you’re aiming for the vibrant pigment in a drippy design or nuanced tones in a nautilus pattern, coloring your slip opens endless artistic avenues.

Before you start, make sure to follow the stain manufacturer’s instructions closely. Different compositions of clay and stains might not play well together—particularly pink and purple shades. If your clay has high zinc content, chrome-tin stains might not achieve the desired pop of color.
For some practical inspiration:
- Blue Slip: Add 0.25-0.5% Cobalt Oxide.
- Black Slip: Combine 1% Red Iron Oxide, 1% Manganese Dioxide, 0.25-1% Chrome, and 0.25-1% Cobalt Oxide.
These oxides work an unbeatable charm, bringing color and life to your pottery like never before. With a dab, a smear, or a drippy flourish, let your creativity guide your choices.
Your Turn to Create
Venturing into the world of slip opens up exciting possibilities in texture, color, and design. Whether you’re attaching parts, decorating, or simply exploring new ceramic horizons, the slip is your versatile companion. Ready to jump in and mix your masterpiece? Share your creations and experiences in the comments—let’s ignite some pottery passion!

For more recent inspirations, visit our recent articles and content to fuel your ceramic imagination further.
CHZDPP Recessed Anti Slip 19 7×19 7x2in 50x50x5cm
Elevate your workout routine with KANGFITER Non-Slip Fabric Resistance Bands. Designed for both women and men, these durable loop exercise bands are perfect for targeting the booty, legs, butt, and glutes. Crafted from high-quality non-slip fabric, they ensure comfortable, effective workouts, whether you’re at home or in the gym. Ideal for enhancing stretches and exercises, these resistance bands are essential fitness tools for achieving your fitness goals.
Learn How to Make Slip with Crockd
To further enhance your pottery skills, watch this insightful video by Crockd titled “How to make Slip 💪 mix clay and water together to create your diy superglue,” which demonstrates the process of creating slip and its applications in various ceramic techniques.
How do I make my own slip?
Making your own pottery slip is easier than you might think. Here’s a simple process to follow:
1. Gather and dry out any leftover clay scraps in a jar or container.
2. Add enough water to cover them, using recycled clay water if possible.
3. Stir the mixture thoroughly, then let it rest overnight so the clay fully absorbs the water.
4. In the morning, stir again until the slip reaches a smooth, creamy consistency—now it’s ready for use in your ceramic projects.
Is slip just clay and water?
In essence, yes—pottery slip is a blend of clay and water, often called “clay slurry.” Its texture can range from thick cream to a thinner liquid, depending on how you plan to use it. Slip plays a vital role in joining pieces of clay, filling in gaps, or even adding decorative accents to your ceramic work.
How to make vinegar slip?
If you want an extra strong bond, many potters swear by vinegar slip. You can add a splash of vinegar to your regular slip or even use straight vinegar on the clay before joining. The mild acidity helps soften the clay’s surface, creating a stronger connection between pieces than water or standard slip alone.
I hope this guide on how to make slip has been helpful in your pottery journey. Mastering slip not only enhances your techniques but also opens up a world of creative possibilities in your ceramic projects. Remember, practice makes perfect, so don’t be afraid to experiment and find the methods that work best for you.
Stay Connected and Keep Creating
I'd love to see your slip-making adventures and the beautiful pieces you create! Be sure to follow us on Instagram for more tips, inspiration, and to share your progress with our creative community. Let's continue this artistic journey together!
Leave a Reply
Venture into a world where clay and creativity converge at JJClayStudio.com – where every piece tells a story. Unearth your next treasure and become part of the narrative that turns everyday moments into artful experiences.